How to add Passage Authentication in Nextjs
My submission for the 1Password Hackathon by 1Password and Hashnode
Table of contents
- So What is Passage?
- How did I use it in my Nextjs App?
- Let's start adding Passage in your Nextjs app
- Passage Console
- Implementing Passage Authentication😁
- Typescript Support
- Creating the sign-in page
- API endpoint for Passage Authentication
- Promptopia
- Packages that I used in my project
- Final result
- Project code
- Conclusion
- Explore My Portfolio
First, I want to thank 1Password and Hashnode for hosting this amazing hackathon. It's my first time entering hackathons and it's awesome to join the Hashnode community that has innovation and lovely vibes 🥰.
So What is Passage?
Passage is a secure and Complete User Authentication solution. That helps you integrate secure login and registration with biometrics or magic links instead of passwords into your applications plus providing the smoothest login experience possible.
How did I use it in my Nextjs App?
So I used Passage to implement user Authentication in my Nextjs app, which was a bit challenging because I used Nextjs 13 with experimental features like using the app directory and adding custom styling to the passage-auth element but the result was great 😁.
Let's start adding Passage in your Nextjs app
First, you'll need to install the passage-elements package from npm:
npm i --save @passageidentity/passage-elements
Passage Console
To use Passage, you have to signup here first, go to My Apps, then create a new app
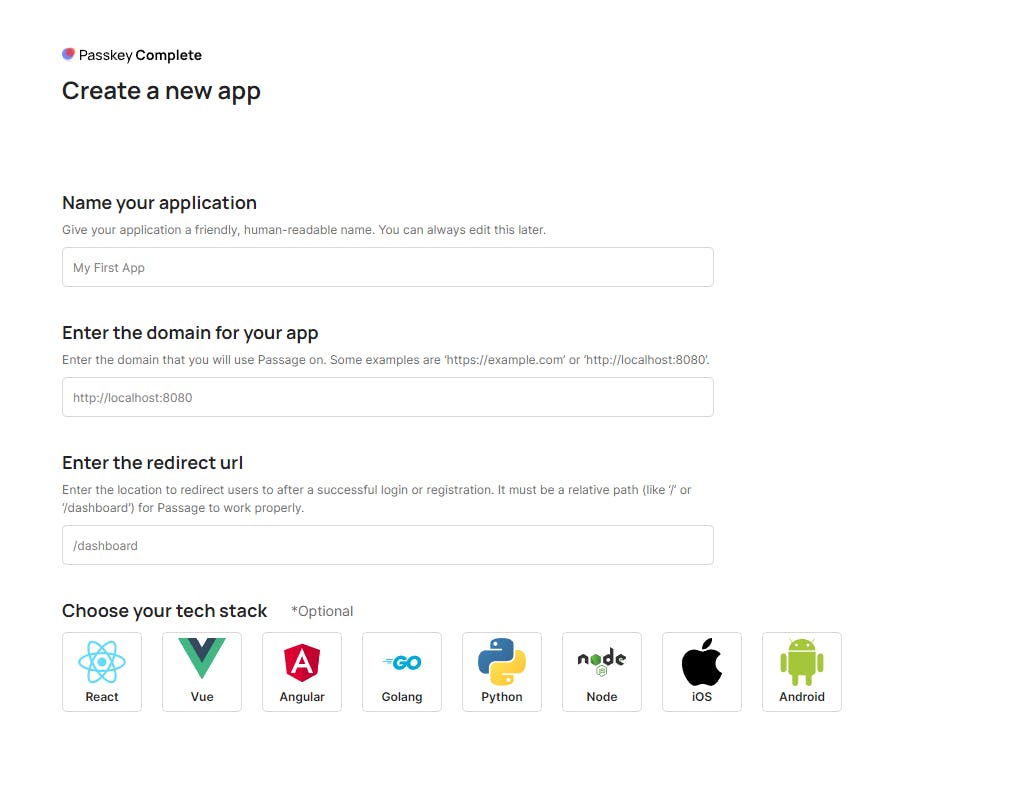
You can give any name for your app, for the domain in Nextjs it will be localhost:3000, and the redirect URL is the URL that will be used to redirect the user after a successful login or registration, like /dashboard or /home.
After creating your app, you will be redirected to the app dashboard. A new App ID will be generated to use it in your app.
To find it, head to the settings section then general
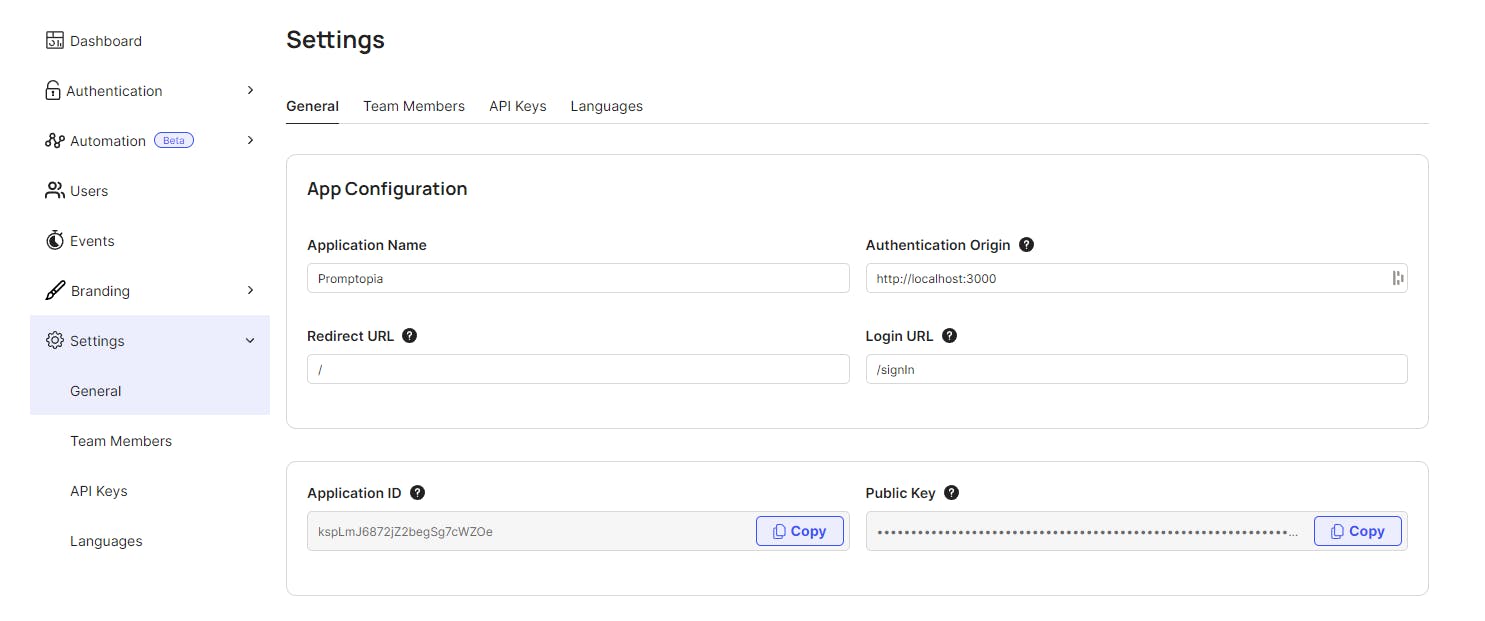
Plus you need the API Key to do API requests like checking if the passage auth token is still valid or not. To generate one, head to the settings section then API Keys
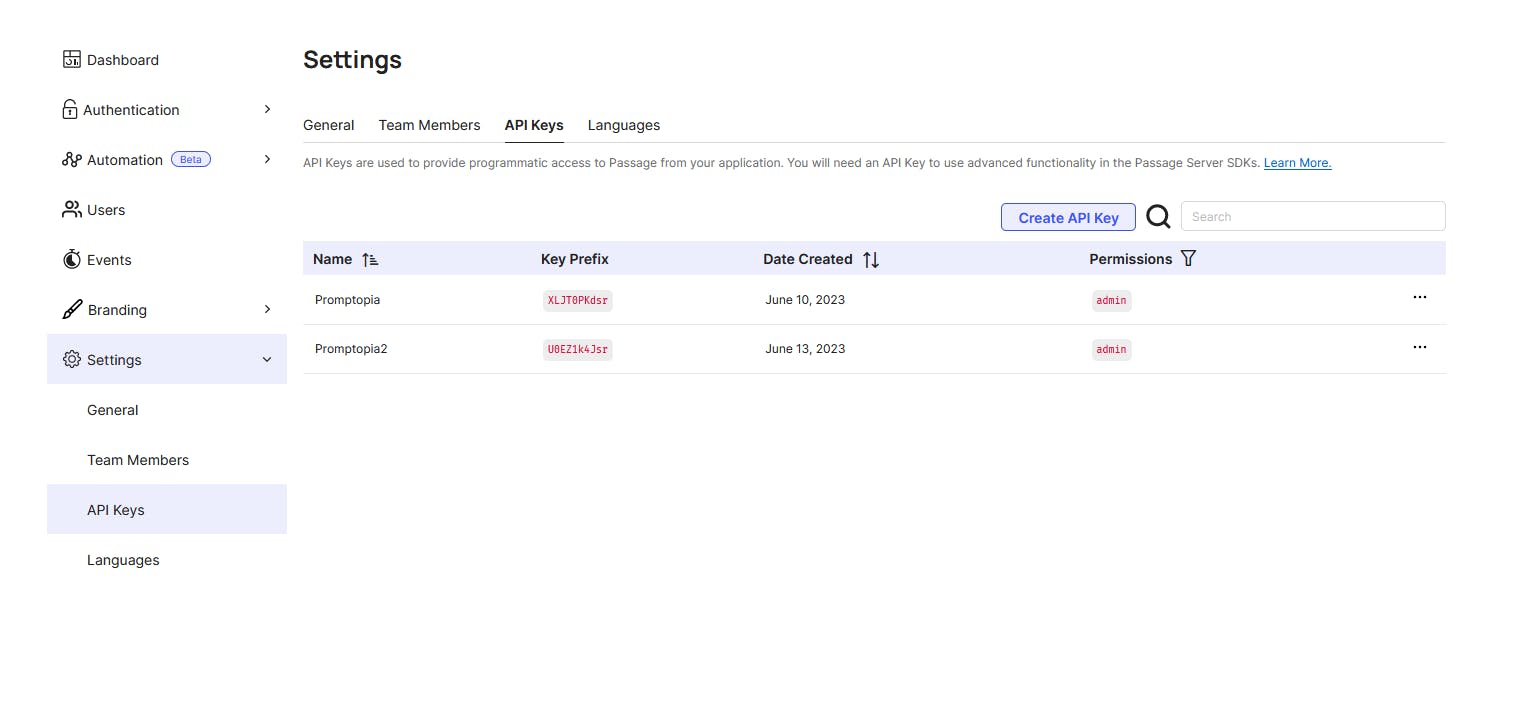
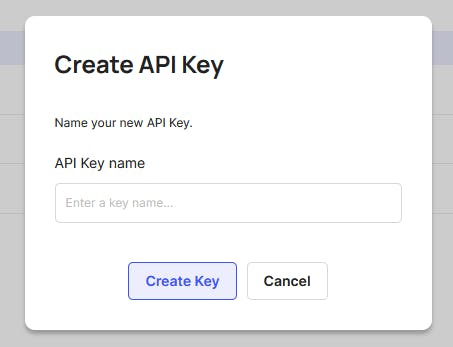
You can give it any name and click the Create Key
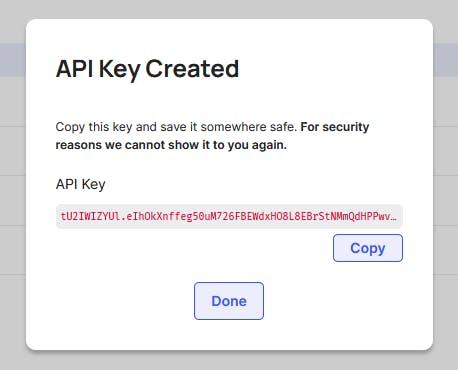
After creating the API Key, you need to copy it somewhere safe because it will be displayed once
Implementing Passage Authentication😁
After creating your app and getting the App ID and the API Key, you will need to create a .env file and insert these Environment variables:
PASSAGE_APP_ID= Your_app_id
PASSAGE_API_KEY= Your_api_key
Typescript Support
If you are using TypeScript with your Next.js app, you’ll need to add the following type declaration to your typings.d.ts file:
declare namespace JSX {
  import {
    PassageElement,
    PassageProfileElement,
  } from "@passageidentity/passage-elements";
  interface IntrinsicElements {
    "passage-auth": PassageElement;
    "passage-profile": PassageProfileElement;
  }
}
Creating the sign-in page
By using the App directory you will create a new page called signIn under the auth folder

And then inside the sign-in page, you will need to render the passage-auth element as follows:
"use client";

import { useEffect, useState } from "react";

type PassageAuthEnvValuesType = {
  appID?: string;
  apiKey?: string;
};

export default function SignIn() {
  const [passageAuthEnvValues, setPassageAuthEnvValues] =
    useState<PassageAuthEnvValuesType>({});

/* isMounted state is added to insure that the
   passage-auth element is getting the appID */
  const [isMounted, setIsMounted] = useState(false);

  useEffect(() => {
    setIsMounted(true);
    require("@passageidentity/passage-elements/passage-auth");

    const fetechEnvValues = async () => {
      const response = await fetch("/api/auth/passageAuth/envValues");
      const data = await response.json();
      setPassageAuthEnvValues(data);
    };
    fetechEnvValues();
  }, []);

  return isMounted && passageAuthEnvValues.appID ? (
    <passage-auth app-id={passageAuthEnvValues.appID}></passage-auth>
  ) : null;
}
API endpoint for Passage Authentication
For the API endpoint, you will need to create an endpoint called envValues to get the Environment variables for Passage Authentication

Inside the envValues route add the following endpoint:
export const GET = async () => {
  return new Response(
    JSON.stringify({
      appID: process.env.PASSAGE_APP_ID!,
      apiKey: process.env.PASSAGE_API_KEY!,
    }),
    { status: 200 }
  );
};
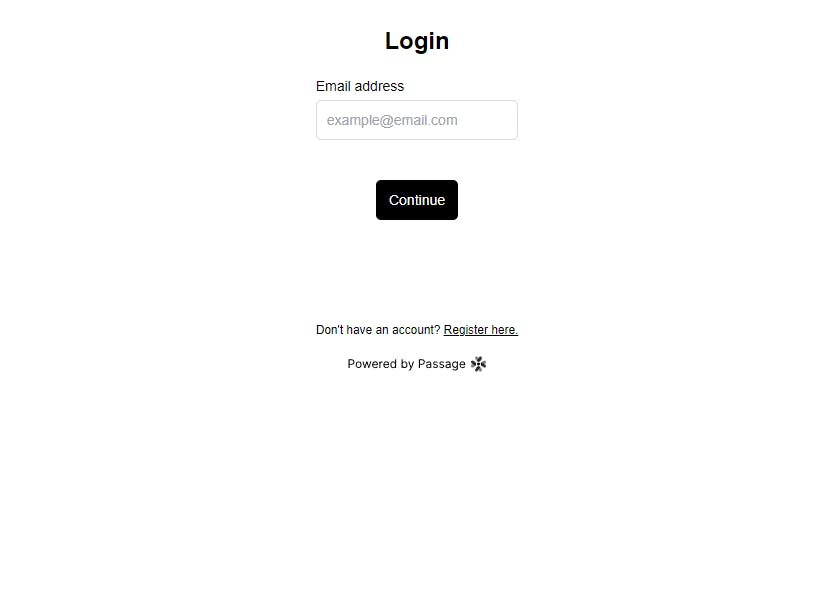
After adding the sign-in page and the endpoint for getting the Environment variables. The passage-auth element will be rendered as expected in the sign-in page
This was the basic implementation of Passage Authentication. But I made a cool implementation with this Authentication in my Nextjs app and it's called Promptopia.
Promptopia
Promptopia is an open-source AI prompting tool for the modern world to discover, create and share creative prompts.
Packages that I used in my project
In this Nextjs app, I used a lot of cool packages:
1- Framer Motion
Framer Motion is a powerful and easy-to-use animation library for React that helps you create smooth, responsive animations and interactions in your web applications.
2- Zustand
Zustand is a simple and lightweight state management library for React applications that allows you to easily manage and share state across components.
3- Tailwind CSS
Tailwind CSS is a utility-first CSS framework for rapidly building custom user interfaces in web applications. It provides a set of pre-built CSS classes that you can use to style your HTML elements, making it easier and faster to design responsive and visually appealing web pages.
4- Mongoose
Mongoose is an Object Data Modeling (ODM) library for MongoDB and Node.js. It provides a simple and straightforward way to model your application data, manage database connections, and perform database operations like validation, querying, and schema management.
Final result
You can check out the final result of the Nextjs app here, plus I deployed it to Vercel. The deployment process was incredibly smooth and blazingly fast 😁.
Project code
I have shared the project code on GitHub, so if you run into any issues while cloning, just let me know in the comments below 👍.
Conclusion
And once again, I am truly grateful to 1Password and Hashnode for organizing such an inspiring event that led to the discovery of a groundbreaking approach to user authentication for any app or website. This innovative method holds the potential to revolutionize our digital experiences and create a brighter, more secure future 🙌.
I hope you enjoyed reading the article. If you have any questions, thoughts, or just want to say hello, I'd be thrilled to hear from you. Here's how you can reach out:
Drop me an Email: majd.sami1996@gmail.com
Follow me 🥰
Explore My Portfolio
If you want to see more of my work, don't forget to check out my portfolio website! There, you'll find a curated collection of my projects, creative endeavors, and a deeper dive into my skills and passions 🔥.
Whether you're looking for design inspiration, curious about my past projects, or just want to connect, my portfolio is the place to be.
Until next time peace ✌️🥰.

